Blog

Blog Posts

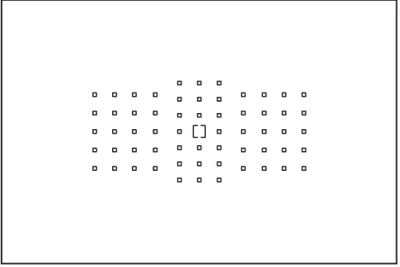
In Part 1 of this blog series I listed the different types of AF Points, and how I have grouped them to make it easier on myself. In Part 2 I discussed the two “single points” AF Points, being Single-point Spot AF (pinpoint or spot as I call it) and Single-point AF (single-point as I call it). For this post I’m going to go into the “Expansion Points” AF Area Modes, which includes the “AF Point Expansion” and “AF Point Expansion Surrounding Points” (don’t those names just flow of the tongue, haha).
AF Point Expansion ( I call this the diamond or expanded point)


This is a diamond shaped AF Area Mode that moves together as one point. It includes one point in center, and also the points on the top, bottom, right, and left. The focus will be prioritized to the centre point, with the surrounding points providing focus assistance. These points will move over the entire array as a group. Just one thing to note that focus being prioritized to the center point is different from some of the other AF Area Modes (and different from similar Nikon AF Area Modes), which will put priority on the closest object, instead of the object that is in the center point.

Focused


The diamond provides a larger area for focusing with and would be used in the following scenarios

-When hand holding, it provides a larger focus point, and therefore will be less likely to slip-off the subject.

-If you have a subject that is moving around a bit, but not too sporadically, it can be easier to keep focus on the subject, and you have the ability to adjust the sensitivity of these points to ensure you stay on the subject.

-This point provides both AF Tracking (adjustments available) and predictive AF.


The downside to the diamond compared to the single point options is that because it is larger, it is less precise, and therefore focus may not always be exactly where you want it. For example if you have a very tiny subject in an animalscape the autofocus might be on the incorrect spot.


I tend to use this AF Area Mode as a starting point for some of my custom settings. Not only is it in the middle of the points that I would use (so easy to adjust up or down), but I find it provides enough precision, but is not too precise that it is a good default point. This is a safe starting point because it typically doesn’t go awry, and then I can adjust the AF Area mode depending on how the situation plays out.


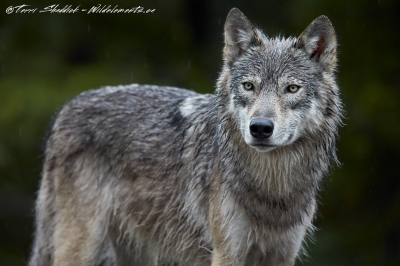
I used the diamond AF Area mode when shooting this wolf because the wolf was moving around quite a bit, and therefore I wanted to make sure that I didn’t suddenly focus on the tip of his nose, or the back of his head/body. The reason I didn’t use a bigger point such as the square, or one of the automatic points, is that I still wanted to have enough control to make sure the correct parts of the head were in focus.


For this AF Area Mode, you can also adjust the focusing parameters using the cases, or manually adjusting the parameters, which will be discussed in a future blog post.


AF point expansion Surrounding Points (I refer to this as the square)
This point is very similar to the AF point expansion (diamond) described above, with the only difference is that it’s a complete square instead of a diamond.


This is a square shaped AF Area Mode, moves together as one point. It includes one point in center, and all the points surrounding it for 9 points in total. This point will prioritize focus to the center point, and then receive assistance from the surrounding points.

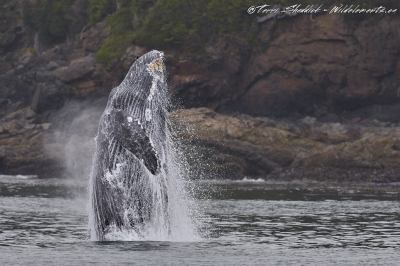
Breathtaking Breach


The square provides a larger area for you to focus than the single points, or the diamond, and I tend to use it in situations similar to described above for the diamond.

-When hand holding, it provides a larger focus point, and therefore will be less likely to slip-off the subject.

-If you have a subject that is moving around a bit, but nor sporadically, it can be easier to keep focus on the subject, and you have the ability to adjust the sensitivity of these points to ensure you stay on the subject.

-A bird in flight, especially one with a bit of an unpredictable flight pattern.

-This point provides both AF Tracking (adjustments available) and predictive AF.


One down side to this AF Area Mode is that it is a bit on the bigger side, for my liking, so I find it can be a bit hard to have precise control over.


I will tend to use the square over the diamond when there is a bit more unpredictability in the subject (moving around a lot, or birds in flight) because it has more supporting points that will take over the autofocus if I slip off the center AF point.


The image of the Humpback Whale breaching, I actually decided to use the square, because there was a lot of unpredictability on where the Humpback Whale was going to come out of the water, and how it would move once it did come out of the water. Therefore I wanted to give myself some more support with the surrounding points. If I had used the diamond I might have lost the focus a lot easier, or not acquired initial autofocus as quickly. I will discuss in the next set of blog posts why I didn’t use one of the zones.


For this AF Area Mode, you can also adjust the focusing parameters using the cases, or manually adjusting the parameters, which will be discussed in a future blog post.


Feel free to email me, [email protected], if you have further questions on the expanded points AF Area modes, or with any other questions. Stay tuned to the next post where I will cover the zones, and automatic area modes, and when they can work for wildlife (and why I don’t often use them).

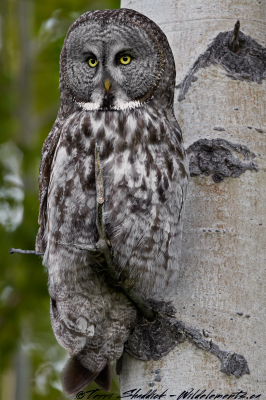
Great Gray Owl looking Statuesque

Statuesque

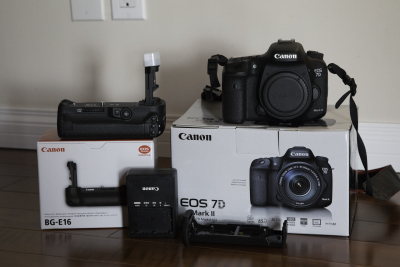
I am selling my used Canon 7D Mark II with Grip. I have had this camera for 2 years, and I am selling it because I have two other camera bodies and this one isn’t being used as often. I am asking $1200 CAD, not including shipping.


This includes the following:
Camera EOS 7D Mark II Body in original box
Canon battery
Battery Grip Canon BG-E16


This camera body is in like new working order, and the body itself is in okay condition with some scratches on the LCD screen which are more noticeable when not using the LCD (pictures of the scratches are available).


This camera was used for a number of the images on my website including, Statuesque and Tell Me About It.


The shutter count of this camera is just under 25,000 shots.


For more information contact me at [email protected].

In Part 1 of this blog series I listed the different types of AF Points, and how I have grouped them to make it easier on myself. In this blog post I’m going to discuss the two “single point” AF Points, being Single-point Spot AF (pinpoint or spot as I call it) and Single-point AF (single-point).


Single-point Spot AF (I call this “spot” or “pinpoint”)


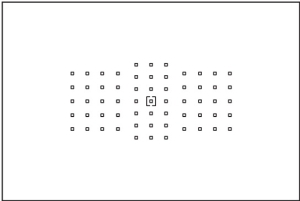
This is the smallest focusing point available. You would use this point when you want focusing to be very precise, as focusing will be done on the very small little square within the bigger square. I find myself using this point in the following situations:


–  When a animal is super close, and I want to ensure I have the exact right focus point (like between the eye and nose of Grizzly Bear); or
–  When the subject is quite small in the frame and I want to make sure that the focus stays on one small point; or
–  If you are shooting a bird in a tree and in between branches, and you want to make sure not to pick up some of these other branches; or
–  When using a large aperture and trying to get a shallow DOF, you want to make sure the exact point where you want sharpness is selected, especially if the entire subject isn’t on the same focal plain.


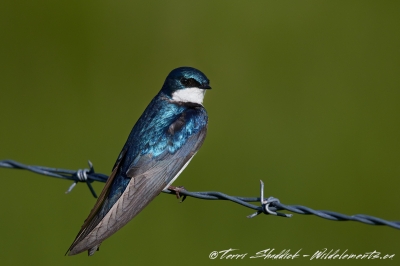
Tree Swallow on barbed wire

Balancing on Barbed Wire

One of the main downsides to using spot is that if you are hand-holding, like I often do, it can be quite easy to slip off the point, because the point is so fine and precise. It is often not the best AF point on a subject that is moving, especially moving fast, because you increase the changes of slipping off the subject and blowing the focus of the entire image. Therefore using this point is more effective when using a tripod on a subject that isn’t moving (or not moving quickly).


I used the spot AF to focus on the Tree Swallow in Balancing on Barbed Wire. I actually started with zone AF when shooting this guy, but then when he landed on the barbed wire and looked like it was going to stay still, I switched to the spot. The reason I did this is because the bird is so small I wanted focus to be on the head/eye and not on its shoulder/wing, especially because I was shooting this wide-open at f/5.6 (Canon 500 f/4 + 1.4x extender). Since the eye is drawn to the sharp part of an image, I wanted to make sure that was the eye of the bird. This image was a combination of using a small point because of the size of the subject, and therefore needed precision, and using a large aperture. In this particular image, if I had even switched and using Single-Point, it could have made a difference and picked up the shoulder of the Tree Swallow.


Single-point AF (referred to as “single-point” throughout the rest of this post):


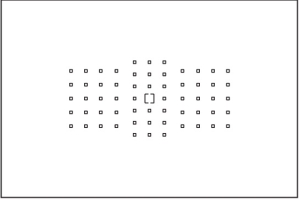
This AF point is slightly larger than the pinpoint above (Single-Point Spot AF as it is called in the Canon manual), and focusing is done on the entire square as shown in the image above. Because this point is similar to the pinpoint, just larger, I would use this in similar scenarios to the pinpoint:

– When a animal is super close, and I want to ensure I have the exact right focus point (like between the eye and nose of Grizzly Bear); or
– When the subject is quite small in the frame and I want to make sure that the focus stays on one small point; or
– If you are shooting a bird in a tree and in between branches, and you want to make sure not to pick up some of these other branches; or
– When using a large aperture and trying to get a shallow DOF, you want to make sure the exact point where you want sharpness is selected, especially if the entire subject isn’t on the same focal plain.


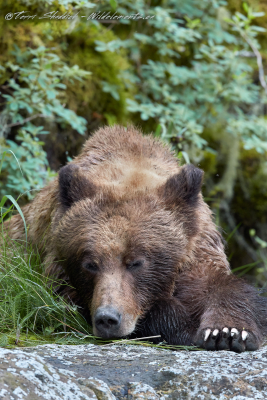
Sleepy Head

Similar to pinpoint, a downside to using single-point is when you are hand-holding the camera, you have a higher risk of losing focus if you slip off the subject. Therefore, again, it is often a point that would be more effective when used with a tripod, and on a subject with either little, or predictable, movement.


For the image of the Grizzly Bear that I titled “Sleepy Head” I used the single-point AF point, because given how zoomed in the shot was it was critical that I got the focus point right so that you can see the dimples in the nose and still have the eye in focus, so therefore I used this point and had it about half-way up the snout of the Grizzly Bear.


With the two points being quite similar just varying slightly in size, the question is what one to choose and when. Well that’s simple, “it depends”. I find that I will often go with the pinpoint when the subject is really small, or when there are a number of things that grab focus (like grass in front of a bear). I will go with the single point when the subject is slightly larger, or if the point being slightly larger won’t really matter.


Feel free to email me, [email protected] if you have further questions on the single point options.  Stay tuned to the next post where I will cover the expansion points.

In Part 1 of this blog series I listed the different types of AF Points, and how I have grouped them to make it easier on myself. In this blog post I’m going to discuss the two “single point” AF Points, being Single-point Spot AF (pinpoint or spot as I call it) and Single-point AF (single-point).


Single-point Spot AF (I call this “spot” or “pinpoint”)

This is the smallest focusing point available. You would use this point when you want focusing to be very precise, as focusing will be done on the very small little square within the bigger square. I find myself using this point in the following situations:


–  When a animal is super close, and I want to ensure I have the exact right focus point (like between the eye and nose of Grizzly Bear); or
–  When the subject is quite small in the frame and I want to make sure that the focus stays on one small point; or
–  If you are shooting a bird in a tree and in between branches, and you want to make sure not to pick up some of these other branches; or
–  When using a large aperture and trying to get a shallow DOF, you want to make sure the exact point where you want sharpness is selected, especially if the entire subject isn’t on the same focal plain.


Tree Swallow on barbed wire

Balancing on Barbed Wire

One of the main downsides to using spot is that if you are hand-holding, like I often do, it can be quite easy to slip off the point, because the point is so fine and precise. It is often not the best AF point on a subject that is moving, especially moving fast, because you increase the changes of slipping off the subject and blowing the focus of the entire image. Therefore using this point is more effective when using a tripod on a subject that isn’t moving (or not moving quickly).


I used the spot AF to focus on the Tree Swallow in Balancing on Barbed Wire. I actually started with zone AF when shooting this guy, but then when he landed on the barbed wire and looked like it was going to stay still, I switched to the spot. The reason I did this is because the bird is so small I wanted focus to be on the head/eye and not on its shoulder/wing, especially because I was shooting this wide-open at f/5.6 (Canon 500 f/4 + 1.4x extender). Since the eye is drawn to the sharp part of an image, I wanted to make sure that was the eye of the bird. This image was a combination of using a small point because of the size of the subject, and therefore needed precision, and using a large aperture. In this particular image, if I had even switched and using Single-Point, it could have made a difference and picked up the shoulder of the Tree Swallow.


Single-point AF (referred to as “single-point” throughout the rest of this post):


This AF point is slightly larger than the pinpoint above (Single-Point Spot AF as it is called in the Canon manual), and focusing is done on the entire square as shown in the image above. Because this point is similar to the pinpoint, just larger, I would use this in similar scenarios to the pinpoint:

– When a animal is super close, and I want to ensure I have the exact right focus point (like between the eye and nose of Grizzly Bear); or
– When the subject is quite small in the frame and I want to make sure that the focus stays on one small point; or
– If you are shooting a bird in a tree and in between branches, and you want to make sure not to pick up some of these other branches; or
– When using a large aperture and trying to get a shallow DOF, you want to make sure the exact point where you want sharpness is selected, especially if the entire subject isn’t on the same focal plain.


Sleepy Head

Similar to pinpoint, a downside to using single-point is when you are hand-holding the camera, you have a higher risk of losing focus if you slip off the subject. Therefore, again, it is often a point that would be more effective when used with a tripod, and on a subject with either little, or predictable, movement.


For the image of the Grizzly Bear that I titled “Sleepy Head” I used the single-point AF point, because given how zoomed in the shot was it was critical that I got the focus point right so that you can see the dimples in the nose and still have the eye in focus, so therefore I used this point and had it about half-way up the snout of the Grizzly Bear.


With the two points being quite similar just varying slightly in size, the question is what one to choose and when. Well that’s simple, “it depends”. I find that I will often go with the pinpoint when the subject is really small, or when there are a number of things that grab focus (like grass in front of a bear). I will go with the single point when the subject is slightly larger, or if the point being slightly larger won’t really matter.


Feel free to email me, [email protected] if you have further questions on the single point options.  Stay tuned to the next post where I will cover the expansion points.

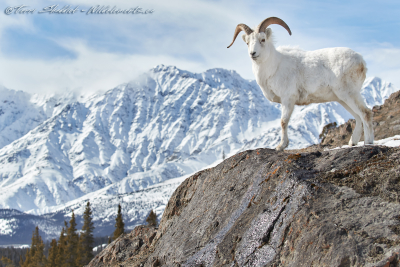
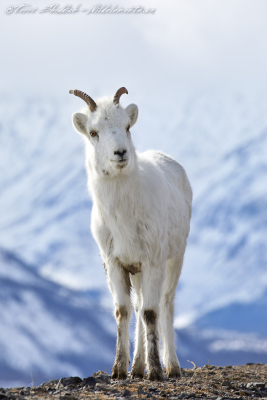
My first time visiting the Yukon was last summer before the Fishing Grizzlies of the Taku. Since then I was back again in November as the starting point of our Alaska Eagles trip. The landscape in this area are just stunning, so when I was given the opportunity to go up to the Yukon and actually spend some time photographing there (as opposed to just using it as a trip starting point), I jumped at the chance. This time, the plan was to spend a few days photographing Dall Sheep that call many of the mountain ranges in this area home.


Anyone that knows me knows that I prefer to photograph the large carnivores of North America (and as evidenced in my portfolio and journeys galleries). Going on a trip that wasn’t focused around these species was certainly a change, but I was up for the change.


I will admit heading into the trip, I thought I would end up with some decent images of Dall Sheep, but I really didn’t expect the calibre of images that I would get. The animalscape opportunities in this area were way better than I anticipated, and some of the best of all the places that I have visited. Instead of just shooting a Dall Sheep, you are really shooting landscape images with Dall Sheep in the image, and the landscapes were really quite stunning.


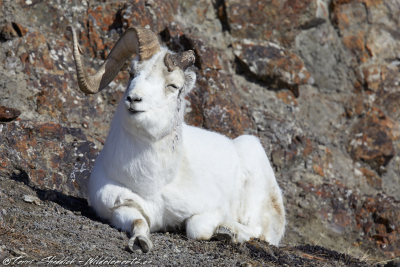
In addition to getting animalscapes, we were also able to capture images of a Ram that lost one of his horns (likely during the rut last year), which our wildlife guide said was really quite rare. We also got some cute images of moms and yearlings resting, and eating together. For just being there for two days, I was really impressed with the variety of images that I was able to capture.


Getting to the areas where these sheep live is really a physical challenge, especially while carrying all my camera gear (two pro bodies and multiple lenses including a 500). We were also dealing with really strong winds and melting snow conditions, but braving these conditions was worth it for the images that I came away with. These were not shooting from the side of the road, or set-up type of images, instead one location required almost two hours of walking in melting snow, and then up and down a pretty steep hill to get to the area where the Rams were hanging out.


This trip gave me a greater appreciation for the life that these sheep have to endure, sleeping on the edge of cliffs, battling winds, climbing mountains, and all the while trying to avoid the predators that also call this area home (such as wolves and wolverines). I know that Dall Sheep were born to live in these conditions, whereas my body clearly was not built to climb mountains. However I endured, and was able to capture some simply stunning images, that I could never have imagined before going on the trip. Having to work so hard for these images actually makes the images more valuable to me, and other than one other photographed (Brad Hill), no one will have these images, because we were the only ones shooting on the hillside these days.


At the end of the two days, I was really sad that I didn’t plan to spend more time with these guys, but when booking you think 2 days should be enough time with Sheep, right? I bet if I spent a week there I would have walked away with some very unique images, with each day offering something different.


To find out more about this trip, feel free to contact me at [email protected].


Notice: Trying to access array offset on value of type bool in /var/www/wp-content/plugins/bridge-core/modules/shortcodes/shortcode-elements/_social-share-list/templates/social-share-list.php on line 104

Canon cameras, and all DSLR’s for that matter, have a number of features that are available to help you get the most out of your photographs. And one of those features is the latest Auto Focus settings that come with some of the newest amateur and professional bodies, including the 1DX mark II.


I have stumbled upon Canon’s recently released guide for the Canon EOS 1D X Mark II, which can be found here. Based on my experience the guide can equally be applied to the Canon EOS 5D Mark IV. This guide is probably one of the most extensive guides that I have seen Canon put out on this subject, which speaks the the importance of understanding the autofocus system, however again, it only speaks to one subject, sports, and it can often be difficult to understand how it applies to what we care about, nature.


However, one of the problems I had with guides like this is really understanding the “Cases”, and when certain AF points makes sense for my situation, since all the examples are sports related, and not wildlife related. I have created this series of blog posts, to breakdown the AF system of the Canon cameras, and how it applies to us nature/wildlife photographers, and what I have learned after my time using these settings. I have also decided to provide some guidance on when I use these settings, however, it always “depends” on when I use what, as every situation is unique.

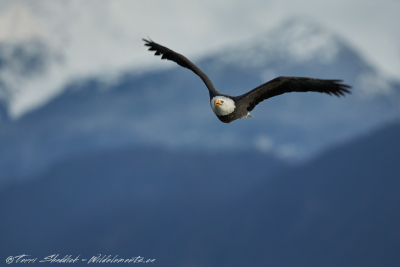
Birds in flight are one of the main subjects when having the correct AF settings can be the difference between making and missing the shot.  For the “Mountainside Voyage” I took advantage of Canon’s Zone AF using the 1DX in order to make sure that if the Bald Eagle takes a detour, I can still keep it in focus and keep getting the sharp shots.

Mountainside Voyage


AF Operation:

When thinking about autofocus, one of the first things to determine is which AF Operation is going to be used, with the options being One-Shot, or AI Servo. For wildlife shooting I have learned that it is unpredictable, and you want to always have yourself setup so you can respond when the unpredictable happens (and you don’t miss the shot). Therefore you want to be in AI Servo, as it will continuously focus on your subject when you press the shutter down halfway, and will have predictive focus capabilities and track the subject when it moves toward you.


For further clarification, predictive AF is NOT the same as subject tracking. When the focus is locked on a subject, Predictive AF will work in AI Servo to focus on the subject as it moves toward or away from you, assuming the subject stays in the AF point (a Grizzly Bear walking directly towards you). Whereas subject tracking is how the autofocus system respond when a subject moves away from the focus point (Grizzly Bear walking away from the AF point to an adjacent point).


You can change the AF operation using the Drive AF button and scrolling with the main dial.


AF Points:

Now assuming you are in AI Servo, the next question is, “Which AF point or AF Area do I use?”. Well the answer to that is simple, it “depends”.


I like to group the AF points into the following four categories:

1. Single Points – (AF Points – Part 2 Blog Post to come)

-Single-point Spot AF

-Single-point AF

  2. Expansion Points – (AF Points – Part 3 Blog Post to come)

-AF point expansion

-AF point expansion with surrounding points

  3. Zones – (AF Points – Part 4 Blog Post to come)

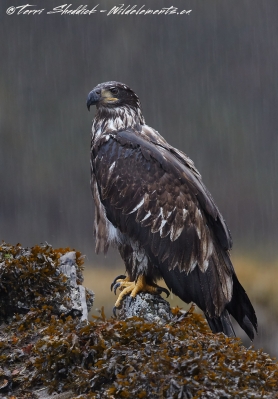
Bald Eagle Perched in Downpour Hurricane

Perched in a Downpour

-Zone AF

-Large zone AF

  4. Automatic selection (AF Points – Part 4 Blog Post to come)


Given the length and complexity of each autofocus point, I have decided to split this topic into several different blog posts, so that I can provide example images, and details on when I would use each point.


Also, following the posts on the AF points, I will also dive into the topic of the “Cases” and explain what they really mean, besides “good for a cycling race” so that you can set yours up for the situation you are presented with.


Knowing how and when to use the above points, and also modifying your cases, can be the difference between getting and missing the shot, especially if you modify these settings and setup your cases to reflect different shooting scenarios.


This image “Perched in a Downpour” was shot with “Single-Point AF”, and the reason that this was required was because we were shooting in an absolute downpour. Any of the bigger AF points would be picking up the rain drops, because they were huge, plentiful and closer to us then the Bald Eagle was. The reason I didn’t go with the smaller, Single-point Spot AF was because we were shooting from a Zodiac and there was some movement with the motor and the movement from the water, so I wanted to have a slightly larger point to help stay “locked-on” the Bald Eagle.

The Photo Tours page on my website is now live.  These trips are offered in conjunction with Brad Hill of Natural Art Images.


Most trips for 2017 are now sold out, however, there are still a few spots available on the Fishing Grizzlies of the Taku.


The 2018 tour dates are also now available, with a number of trips already sold out.  There are still spots available on the Marine Mammals, and Fishing Grizzlies of the Taku.  Visit the Photo Tours page for more information on these trips.


If you would like more information on these trips, feel free to contact me at [email protected].  You can view images from my past trips in my Journeys Galleries.

I’ve had a couple people ask recently what my thoughts were on the Canon EF 400mm f/4 DO IS II lens, and my answer has been the same – to be honest I’ve never even laid my hands on one, so I had absolutely no opinion of it…I couldn’t even tell you if I thought it was really heavy. I decided I should change that, and borrowed one for the weekend from Canon. A weekend isn’t enough to get a full feel for a lens, I would like to have it for months, but a weekend is what I got, which is better than nothing to tell my gut reaction to the lens. I decided to buy the new 100-400mm f/4.5-5.6L IS II after only trying it for a weekend.


One of the main draws of the Canon EF 400mm f/4 DO IS II USM is that it has an f/4 aperture, and weighs just over 4.5 lbs, compared to the Canon 400 f/2.8L IS II which is just under 8.5 lbs (a whopping 4 lbs difference), and the Canon 100-400 f/4.5-5.6L IS II USM is 3.5 lbs.
Image Quality
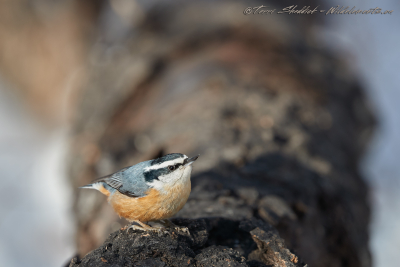
The most critical aspect of any lens, especially once you start spending thousands of dollars on them, is image quality. I found the image quality of the Canon EF 400mm f/4 DO IS II was actually be quite good, I wished I had the 400 f/2.8 to test it with side-by-side (maybe next time), but I was surprised with the sharpness of the images. I found that there was a good amount of fine-detail that was captured when using the lens, like the fine feathers of the nuthatch pictured here.


The images that I took with it were quite sharp, especially compared to the 100-400 f/4.5-5.6L IS II at 400, however that isn’t surprising, and it is somewhat expected because one is a prime f/4 and the other is a zoom at f/5.6, and primes generally tend to be sharper than zoom lenses. However, I do wonder if the difference in image quality is enough to off-set the huge price difference, of over $6500 CAD.


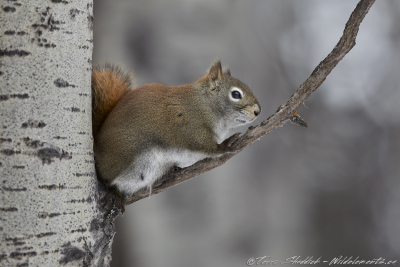
The out of focus zones, or bokeh, is also another area to assess with lenses, and I found that the bokeh was actually relatively clean, obviously no f/2.8, but actually provided nice smooth backgrounds on the images. The squirrel image was taken at f/4 and you can see the background is quite clean and smooth.


Although the image quality was high, I did find that I missed more shots of my “little chirpy birds” (black-capped chickadees, for example) than what I’m used to. There were two reasons I attributed to missing the shots, with one being that I found the autofocus to be a bit slower than I am used to, and secondly was because of the minimum focusing distance.


I’m not sure why the autofocus seemed slower, and resulted in more missed shots, especially when paired with the extenders. But I found that the lens did a lot more searching then what I’m used to with the 500mm f/4 (regardless of whether it’s attached to an extender), and overall just seemed slower.


The minimum focusing distance of the Canon EF 400mm f/4 DO IS II USM is almost 11 feet, which does sound like a lot, until you have a perfectly perched woodpecker at eye level that must have been about 10.5 feet away, and you miss the shot. A reason for getting a 400+mm lens is to make subjects bigger, but if you have to stand so far away that they are no closer then they would be with a 300mm then it’s not really serving it’s purpose, especially where small subjects are concerned. As a point of reference, the minimum focus distance with the Canon 400mm f/2.8L IS II USM is just under 9 feet, and the the 300mm f/2.8L IS II USM is just over 6.5 feet. So therefore you might actually end up with the same subject size if you can get closer and use the 300 vs. standing the minimum distance with the 400mm DO. However if you are shooting larger subjects, further away, like Grizzly Bears, then this is really a non-issue.


Extenders

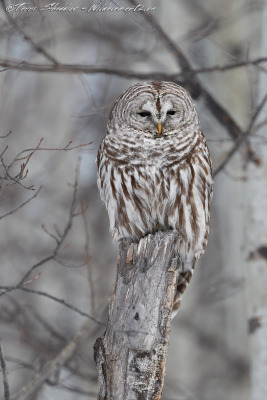
Barred

One benefit of prime lenses (f/2.8 or f/4) is that you are able to increase the zoom by adding an extender, I find the newer ones (version III’s) perform quite well with the prime Canon lenses.


I tested the Canon EF 400mm f/4 DO IS II with both the 1.4x and 2.0x III Canon Extenders, and I found the image quality to be quite good with both the extenders, however much better results were produced when using the 1.4x III Extender. I did notice that they were slightly softer than the images that were taken without the extenders, however they were completely useable images, and unless you were really looking wouldn’t notice the difference.


However, one thing that I did notice was the AF seemed to be a bit slower then I am used to with the 500 f/4, so I seemed to miss a considerable number of shots, especially of the “little chirpy birds” that I was shooting (like the Black-capped Chickadee, and Downy Woodpeckers). I found it didn’t compete with the AF of the 500 f/4 when used with those same extenders, so I’m going to make the leap and say that based on my experience with the 400 f/2.8L IS II, the 400 f/4 DO does not perform as well with the extenders as the 400 f/2.8L IS II.


Portability
As mentioned above, a major highlight of the Canon EF 400mm f/4 DI IS II USM is that it is extremely light and therefore quite portable. The 400 f/4 DO is just over 4.5 lbs, which is actually pretty light for a 400mm lens, and if you attach it to a body without a grip, like the 5D Mark IV, this would bring the total weight to just under 6.5 lbs, which is actually pretty lightweight. This is a very convenient camera/lens combination for walking around and portability.


The weight also makes it an easy lens for hand-holding, especially for long periods of time, I had no problem hand-holding it for over 30 minutes while photographing a Barred Owl, with both the 5D Mark IV, and the 1DX Mark II. I also spent 4 hours walking around the park with the lens in my hands, and didn’t need a massage the next day.


The other thing that I noticed when hand-held shooting with this lens is that the balance is really well distributed, and so it feels quite comfortable when hand-holding it for shooting for longer periods of time. I actually found it nicer to hand-hold than the 100-400 f/4.5-5.6L IS II when extended to 400, which I found to be a little less balanced (but still quite easy to hand-hold, especially because it’s light).


Overall Thoughts

I actually find the lens to be pretty expensive, with the Canadian Price coming in around $9,300 versus the Canon 400 f.2.8L IS II costing approximately $13,500 Canadian. Also of note the Canon 500 f/4L IS II USM cost around $11,700 Canadian Dollars. For me, I would rather pay the extra and own the 500mm f/4 than the 400 DO f/4, which I guess is why I own the 500 and borrowed the 400 DO. I find the autofocus on the 500mm to be faster, and 500mm has more focal range (which compliments my 100-400 better).


The benefit of the 400 DO over either the 400 f/2.8 or the 500 f/4 is the overall weight and size, and the portability of the lens. It makes an excellent travelling around, or walking around lens, especially if you don’t have a tripod to stick it on.


While the image quality is quite good, and the performance with the extenders, and the minimum focus distance left a little to be desired, and I feel like the 400mm f/2.8L IS II, or the 500mm f/4L IS II to be better options (for the price).


If you have any questions on this blog post, feel free to contact me at [email protected].

Canon has released an updated firmware for the EOS-1D X Mark II, version 1.1.3.


The following improvements have been made with the release of this firmware:

1. Corrects a phenomenon in which the Custom Shooting Modes (c1-c3) are not displayed correctly.

2. Increases the maximum number of “Release cycles” displayed from 1,000,000 cycles to 9,999,000 cycles. This value can be checked under the “Camera system information” menu.

3. Improves the reliability of communication via USB cable.


The updated firmware can be downloaded from Canon’s Website.  Be sure to read and follow the instructions to properly update the firmware.


If you have any questions, feel free to contact me at [email protected].

Barred

Last weekend I received from Canon the Canon EF 400mm f/4 DO IS II USM to test. Given that it’s February, my “big” subjects (like bears) are on vacation (also known as hibernation), so I took to the parks in Calgary to snap off as many shots as possible with the lens, to get a feel for how it performed.


I’ve had the chance to quickly go through some of the images, and based on gut feel, the image quality is that this lens produces is really quite good.


I found the autofocus to be a little slower than I was expecting, especially when attached to extenders, and I became quite frustrated with the minimum focus distance of 11 feet, which seems like a lot, until you have a Downy Woodpecker land on the perfect perch 10 feet away.


While I compile all my thoughts into a comprehensive blog post, I figured I would share one image that I took that I was quite impressed with. This Barred Owl was shot with the Canon EF 400mm f/4 DO IS II USM with a 2.0x III Canon Extender attached to the Canon 1DX Mark II, and given that it was shot with the 2x extender, it is really quite impressive.


More on this lens to follow, but if you have specific questions in the meantime, feel free to contact me at [email protected].


Notice: Trying to access array offset on value of type bool in /var/www/wp-content/plugins/bridge-core/modules/shortcodes/shortcode-elements/_social-share-list/templates/social-share-list.php on line 104

I’m a little late with this blog post, but I had a wonderful time during my winter trip to Yellowstone National Park. The last few years I have taken the Christmas Break and gone down to Yellowstone, and despite the fx rate, decided at the last minute that I would do the same thing for a few days this Christmas. Yellowstone in the winter is different than Yellowstone in the Spring or Summer in that only a small portion of the park is even open, from Mammoth Hot Springs through the Lamar Valley to the North East Entrance in Cooke City, and it tends to be reasonably quiet, even over Christmas break.

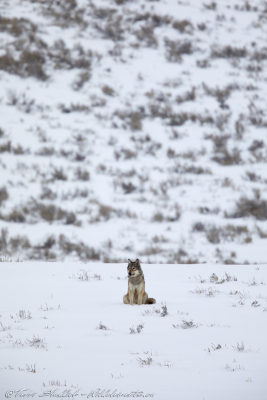
Lone Wolf

What draws me to Yellowstone is that it usually has a wide variety of wildlife to photograph from Bison, Elk, Deer, Coyotes, and if I’m lucky wolves. Besides the wildlife photography, I really enjoy snowshoeing in the powder snow that falls in Yellowstone, and exploring areas off the beaten path. I don’t usually go into a trip with any expectations, and this trip was no different, my only expectation was to get away for a few days and get a break from the office and just get out in nature and get my head cleared.


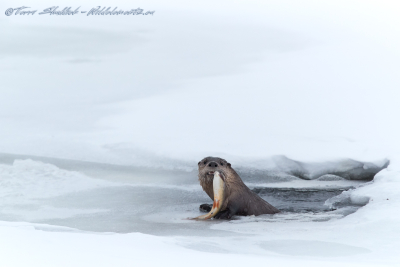
After spending time the last three winters in Yellowstone, I’m coming away this year realizing that no year has been the same, with a different highlight the last three years. Last year I was thrilled with my opportunities that I had with the wolves, however this year, had considerably less chances with them. Instead, I had an unforgettable day with River Otters, which was a first for me, and I spent pretty much the entire day just photographing the River Otters. I walked away with some excellent images from the experience (if only there was better light), and I really enjoyed the opportunity to watch up to five of them coming out of the water and “playing” around in the snow. I was also really lucky in that I saw several of them with trout, so not only did I get to see them, photograph them, but also got them with a meal, which is really quite the opportunity.

Fishing Hole

River Otters are known to be a playful species, and I wasn’t disappointed. They came out of the water a number of times and would roll around in the snow, crawl over one another, and even “dance” around before jumping back in the water and taking off. They also seemed quite curious and looked right at the photographers that were enthralled with them, and the River Otters seemed like they were showing off for us a bit. One word of advice if you are looking for River Otters, if you see something duck their head in the water and assume it was just a duck or dipper, have a second look and make sure that it isn’t actually a River Otter.


I was surprised, however, that I came away with very few shots of the “staple” species such as Bison, Elk, and Pronghorn, especially compared to previous years.


Last year in Yellowstone I had some unforgettable Wolf encounters, seeing wolves everyday of the over one week trip, and getting the opportunity to watch as two wolves tried to take down a large male elk, or as members of the wolf pack fed and slept next to a carcass. I also had the chance to hear them howling around me while snowshoeing, which if you have ever experienced it you know how mesmerizing it is. But this year I had a few far off wolf sightings, however the photographs did not compare to what I had the year before. But the highlight of getting to see River Otters made the lack of wolf photos worth it.


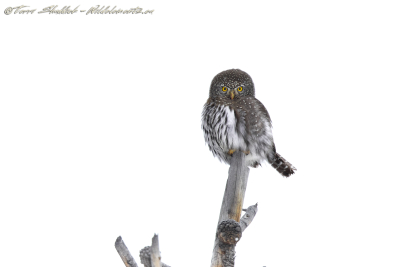
Pygmy on Point

This year I also saw a few Northern Pygmy Owls which was another photography first for me. The only unfortunate part (from a photographers perspective) is that they were always perched on the very top, or close to it, of very tall trees, I still walked away with my best shots of Northern Pygmy Owls, and now that I know what to look for I’m optimistic that I will see more, and get even better shots in the future.


So while the trip wasn’t like it was last year, or even the year before, I wouldn’t hesitate to visit Yellowstone again next winter if I have the time.


Stay tuned to my Recent Photos for images posted as I edit them, and if you would like to learn more about my recent trip to Yellowstone, feel free to email me [email protected].