In Part 1 of this blog series I listed the different types of AF Points, and how I have grouped them to make it easier on myself. In Part 2 I discussed the two “single points” AF Points, being Single-point Spot AF (pinpoint or spot as I call it) and Single-point AF (single-point as I call it). For this post I’m going to go into the “Expansion Points” AF Area Modes, which includes the “AF Point Expansion” and “AF Point Expansion Surrounding Points” (don’t those names just flow of the tongue, haha).
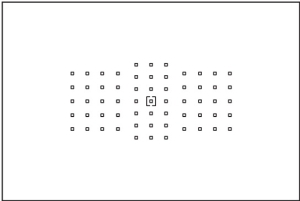
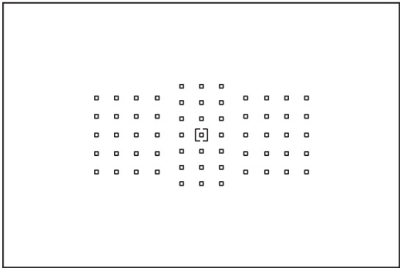
AF Point Expansion ( I call this the diamond or expanded point)
This is a diamond shaped AF Area Mode that moves together as one point. It includes one point in center, and also the points on the top, bottom, right, and left. The focus will be prioritized to the centre point, with the surrounding points providing focus assistance. These points will move over the entire array as a group. Just one thing to note that focus being prioritized to the center point is different from some of the other AF Area Modes (and different from similar Nikon AF Area Modes), which will put priority on the closest object, instead of the object that is in the center point.
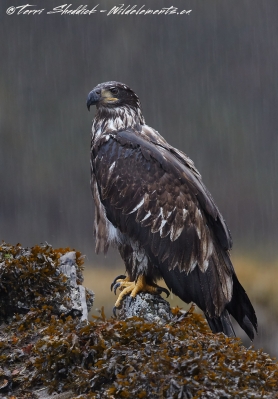
Focused
The diamond provides a larger area for focusing with and would be used in the following scenarios
-When hand holding, it provides a larger focus point, and therefore will be less likely to slip-off the subject.
-If you have a subject that is moving around a bit, but not too sporadically, it can be easier to keep focus on the subject, and you have the ability to adjust the sensitivity of these points to ensure you stay on the subject.
-This point provides both AF Tracking (adjustments available) and predictive AF.
The downside to the diamond compared to the single point options is that because it is larger, it is less precise, and therefore focus may not always be exactly where you want it. For example if you have a very tiny subject in an animalscape the autofocus might be on the incorrect spot.
I tend to use this AF Area Mode as a starting point for some of my custom settings. Not only is it in the middle of the points that I would use (so easy to adjust up or down), but I find it provides enough precision, but is not too precise that it is a good default point. This is a safe starting point because it typically doesn’t go awry, and then I can adjust the AF Area mode depending on how the situation plays out.
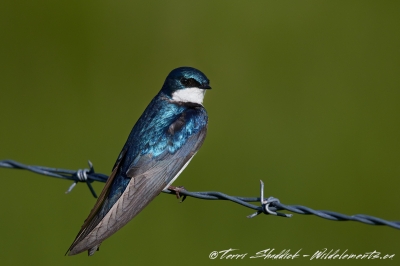
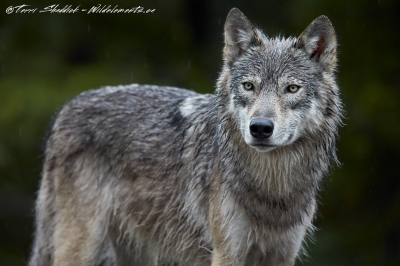
I used the diamond AF Area mode when shooting this wolf because the wolf was moving around quite a bit, and therefore I wanted to make sure that I didn’t suddenly focus on the tip of his nose, or the back of his head/body. The reason I didn’t use a bigger point such as the square, or one of the automatic points, is that I still wanted to have enough control to make sure the correct parts of the head were in focus.
For this AF Area Mode, you can also adjust the focusing parameters using the cases, or manually adjusting the parameters, which will be discussed in a future blog post.
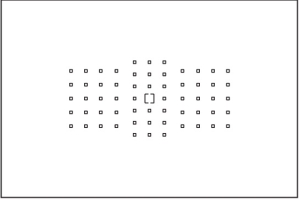
AF point expansion Surrounding Points (I refer to this as the square)
This point is very similar to the AF point expansion (diamond) described above, with the only difference is that it’s a complete square instead of a diamond.
This is a square shaped AF Area Mode, moves together as one point. It includes one point in center, and all the points surrounding it for 9 points in total. This point will prioritize focus to the center point, and then receive assistance from the surrounding points.
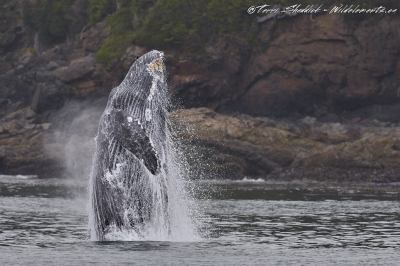
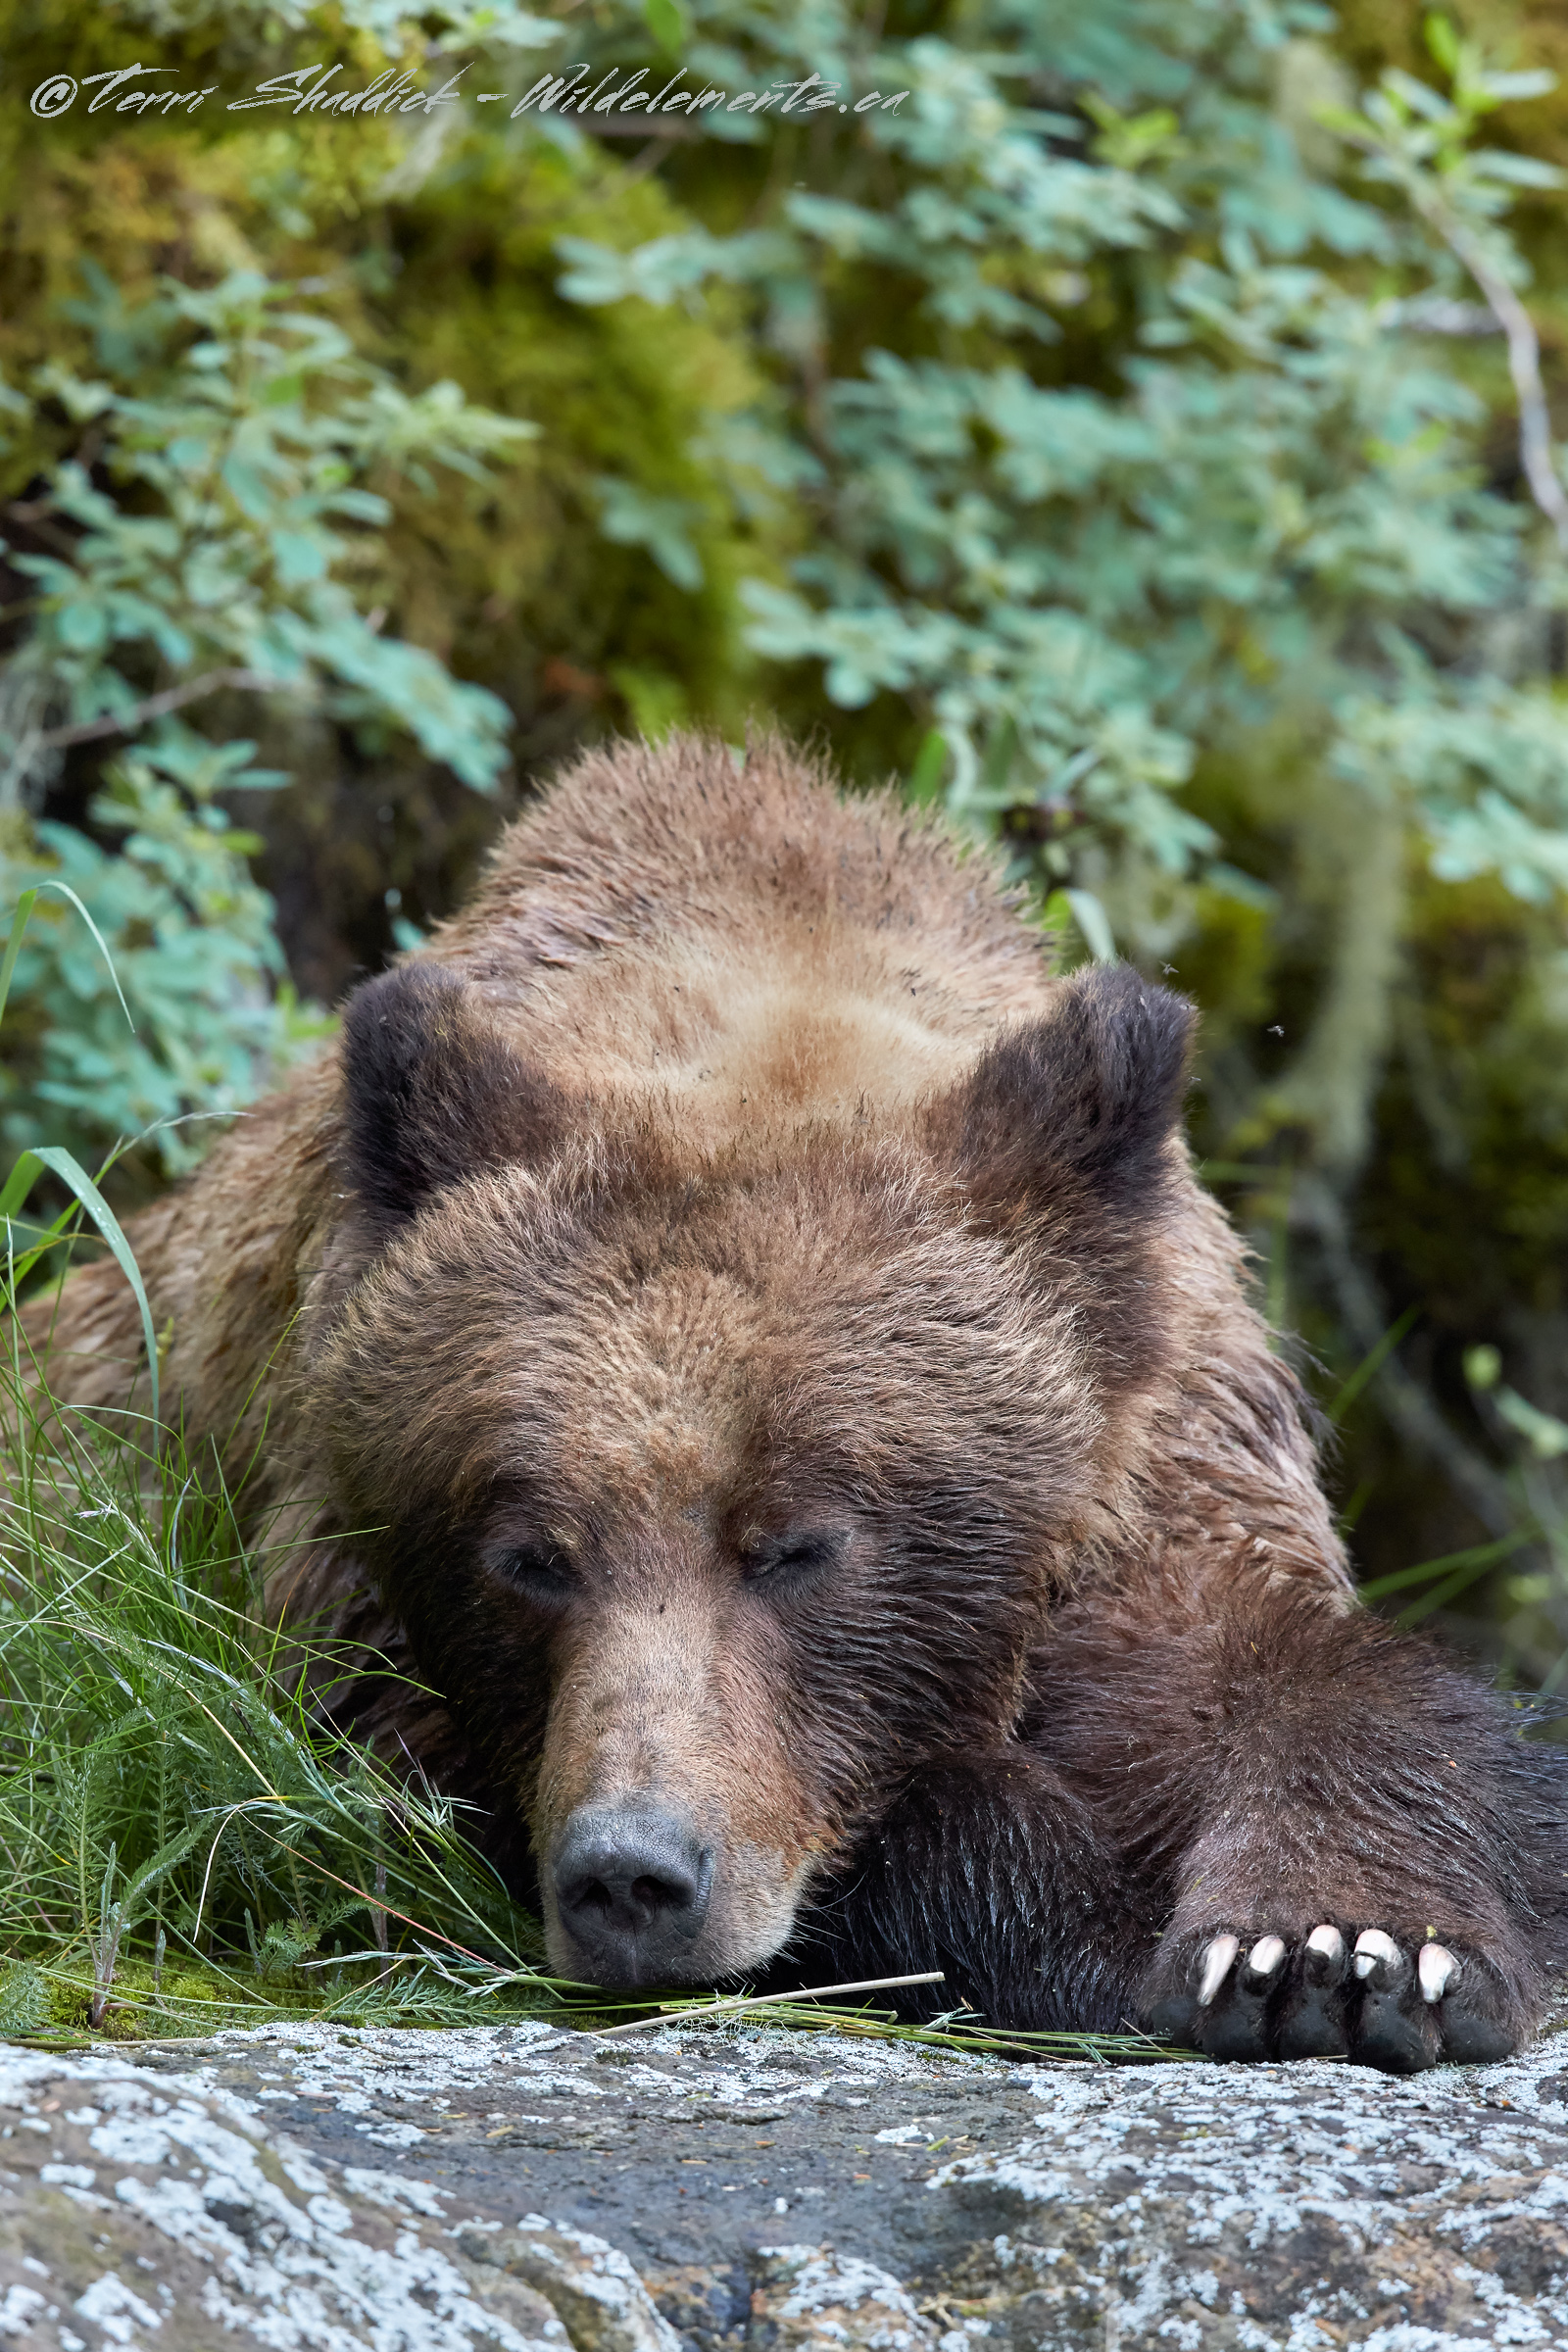
Breathtaking Breach
The square provides a larger area for you to focus than the single points, or the diamond, and I tend to use it in situations similar to described above for the diamond.
-When hand holding, it provides a larger focus point, and therefore will be less likely to slip-off the subject.
-If you have a subject that is moving around a bit, but nor sporadically, it can be easier to keep focus on the subject, and you have the ability to adjust the sensitivity of these points to ensure you stay on the subject.
-A bird in flight, especially one with a bit of an unpredictable flight pattern.
-This point provides both AF Tracking (adjustments available) and predictive AF.
One down side to this AF Area Mode is that it is a bit on the bigger side, for my liking, so I find it can be a bit hard to have precise control over.
I will tend to use the square over the diamond when there is a bit more unpredictability in the subject (moving around a lot, or birds in flight) because it has more supporting points that will take over the autofocus if I slip off the center AF point.
The image of the Humpback Whale breaching, I actually decided to use the square, because there was a lot of unpredictability on where the Humpback Whale was going to come out of the water, and how it would move once it did come out of the water. Therefore I wanted to give myself some more support with the surrounding points. If I had used the diamond I might have lost the focus a lot easier, or not acquired initial autofocus as quickly. I will discuss in the next set of blog posts why I didn’t use one of the zones.
For this AF Area Mode, you can also adjust the focusing parameters using the cases, or manually adjusting the parameters, which will be discussed in a future blog post.
Feel free to email me, [email protected], if you have further questions on the expanded points AF Area modes, or with any other questions. Stay tuned to the next post where I will cover the zones, and automatic area modes, and when they can work for wildlife (and why I don’t often use them).